Showing posts with label Filofax. Show all posts
Thursday, October 29, 2015
♡ Out with the old, in with the new - My new Filofax!
Hellllloooooo!!! It's been a long, long time since my last post. I sincerely apologise from the bottom of my heart. Uni has been crazy and technically I'm still not done for the semester - I'm procrastinating at the moment :D But since something very special came in the mail today, I thought I'd make an exception. I've also made a whole list of blog post ideas so hopefully in the upcoming holidays, I'll be back on the blogging bandwagon. And hopefully this little beauty will keep me organised to balance uni and blogging next year!
You may or may not have already seen on Instagram but I have actually sold my Orange Metropol. Yes, you heard right, sold. I know I could have just kept it but it was just sitting in my drawer the whole time, not being used. One of the biggest reasons I haven't been posting is that I haven't actually been using my Filofax at all. To be honest, it was quite counter-productive. I felt organised, hauling a cute little Filofax around, but really, the decorating and the Instagramming and all that was so distracting that it didn't keep me organised at all. In fact, it was hindering my uni work and not helpful at all. That's why I bought this cheap Kikki K planner for $5 halfway through the year that I was 'allowed' to be messy in and I found that this really helped me stay organised.
And then I sort of just fell out of love with planners and Filofaxes. I still liked them and thought they were cute but I just wasn't so interested anymore. That was until I happened across the Nude Original. I had always wanted an Original. I actually bought a Fluoro Pink one when it first came out but unfortunately it didn't make it to me (I got my money back though). Initially I thought of it as a sign that I shouldn't have spent so much on a planner & I was quite glad I didn't end up getting it because when I saw it in person, it was a lot brighter than I imagined. But this one... Man, where do I get started?
I've been stalking every Instagram account and YouTube Channel that featured Nude Originals and I had such a heard time deciding if I wanted it because of the colour and texture of it. I had so many questions because it looked so different from one person's photo to another. Was it really shiny? Did it have sort of a 'matte-r' finish compared to other patents? Did it get dirty easily? Was it a lighter or darker nude?
As you can see, I was really obsessed with it. But then one day, I decided to bite the bullet and got it off eBay - funnily enough it was the same seller that had failed with my Fluoro pink one years ago - but I was so relieved when I got it. The seller was Quickdraw Stationery on eBay if you're interested. It came so well-packaged and even in a box so that it didn't get damaged in the process (perfect rings!). Not to mention it's so much cheaper and the shipping really isn't that bad.
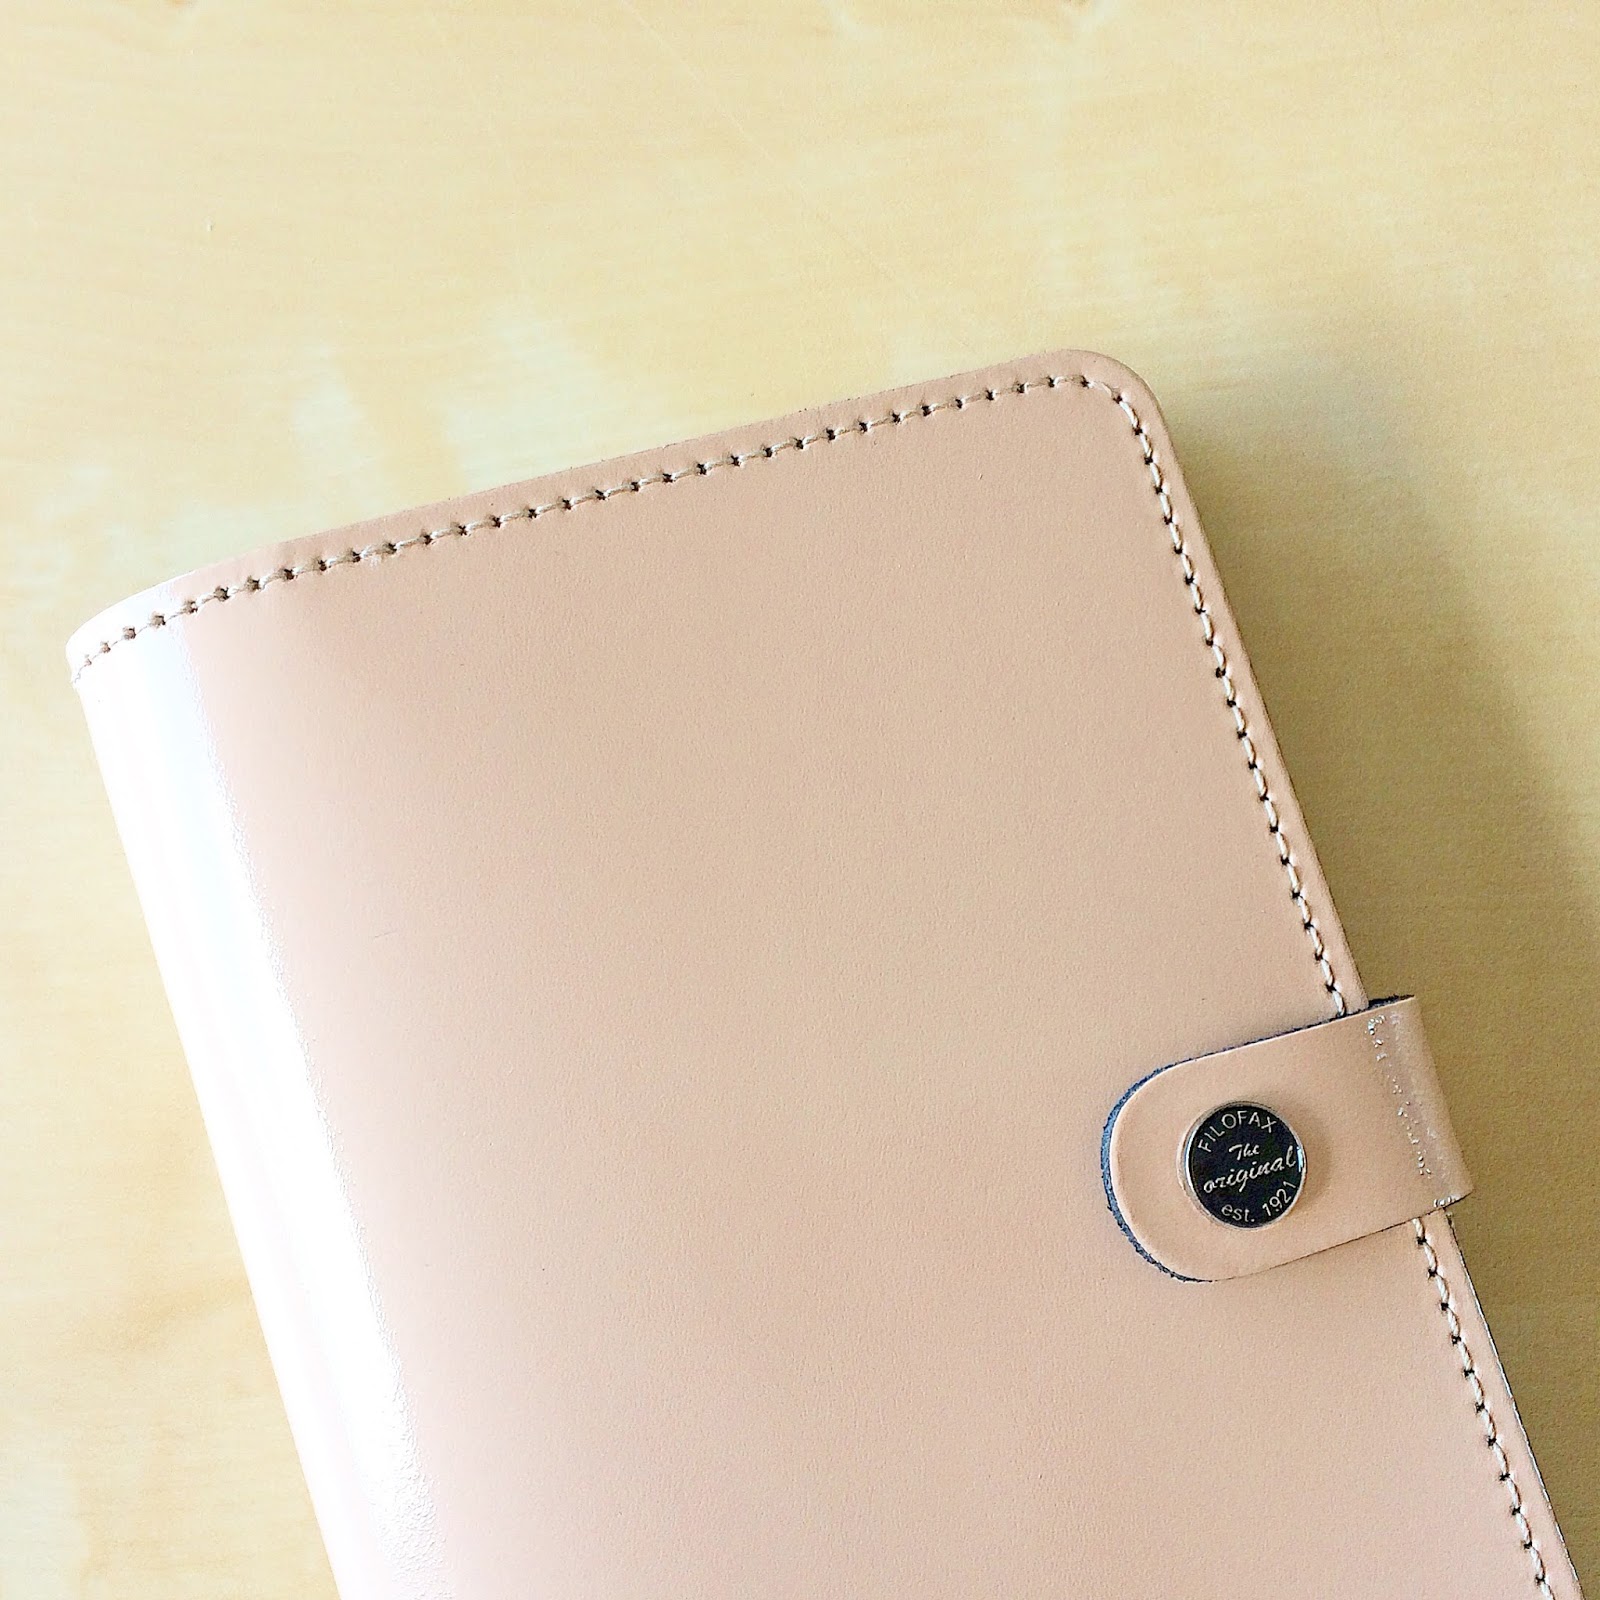
Anyway, after all that rambling, I just wanted to give you an update that I got it and I love it and I'll definitely be doing a setup & review post in the near future. But my first impressions are that it is still shiny, of course being patent. I saw the purple and fuchsia ones in store and didn't like how overly shiny they were (sorry to anyone who owns them! It's all personal preference!). The nude definitely isn't as shiny but you can still sort of see your reflection in it and what not. I love the light beige colour, the simple interior, the quality of the leather and that it lays flat. Honestly, I am so back in love with ring-bound planners and I really think that this is the one. I'm sure we've all said that before but this is one that I've put a lot of time and thought into and my first real leather planner and think that I'll have and use this for a long time.
On that note, I want to add that I still want this to be a functional planner for me, rather than just a pretty & neat one that I spend hours on decorating & whatnot. Because of this,you may notice that it is not as colourful or neat as before so I hope you don't mind too much. I'll still decorate when & if I can, I just didn't want to get your hopes up or anything.
Wow, that was a really long post! I guess I had a lot to say after all this time!
Hope you enjoyed this & I hope to see you soon!
Love Always,
Anna Banana ♡
Sunday, December 28, 2014
♡ My Week: 22-28 December 2014 + Year in Review
Umm...how is it the last week of 2014 already? Well, not officially but...kinda. I mean, this time next week it'll be 2015! A lot has happened this year, no doubt. I thought I'd do sort of like a reflection of the year that was...
One of the biggest & saddest things that happened this year was the fact that my grandmother passed away. I sill miss her & think about her and can't believe it'll be her one year anniversary in 2 short months.
Another would be the fact that I took some time off uni to focus on getting myself back on track. I had half the year to sort myself out & haven't quite gotten to where I wanted to but I have confirmed my re-enrolment and will be back at school in March.
I would never have been able to get through this year without my friends & family by my side. I know my parents won't be reading this but I just wanna give them a shoutout. They understood my decision to take a break and supported me through it all. My best friend since I could remember, Monica, her boyfriend Jeremy & of course, my one & only, Kalen. I honestly don't know where I'd be without him.
And of course, Teddy. Teddy, Ted Ted, Teddy. As I am typing up this blog post, she is squirming on my lap, trying to lick my face. She hasn't been easy, that's for sure. And I've got the bite marks all over my arms & legs to prove it. But she's been such a cheery addition to the family that has brought the house alive.
How has your year been? Ups & downs are expected I guess but the fact that we can get over it & move on with our lives is what makes us stronger and ready for the new year, right? I hope you've all been well & I can't thank you all enough for your love & support as well. You are what keeps me going, wanting to photograph everything & share with you all. xx.
Love Always,
Anna Banana ♡
Sunday, December 14, 2014
★ IMPORTANT ANNOUNCEMENT Regarding 2015 Monthly Inserts
I am sorry to report that a very kind reader has informed me of a typo in the 2015 Monthly Insert. The June month has the year 2014 instead of 2015. I would have fixed this & posted the new one ASAP if it wasn't for my laptop breaking down. I no longer have Microsoft Word & so unfortunately, I will not be able to fix it for a while.
I sincerely apologise for this error & will do my best to get it done as soon as possible & thank you for letting me know of my mistake. Please be sure to tell me in the case there are any more.
Love Always,
Anna Banana ♡
I sincerely apologise for this error & will do my best to get it done as soon as possible & thank you for letting me know of my mistake. Please be sure to tell me in the case there are any more.
Love Always,
Anna Banana ♡
Monday, December 8, 2014
#BLOGMAS: Annie's Favourite Thiiiiiings! (Giveaway time!)
It has been waaaaay too long since my last giveaway & I kept telling myself do a 2K giveaway, which then turned into a 2.5K giveaway, and maybe someday soon, even a 3K giveaway! But I just wanted to show you just how much I appreciated all your love & support all these years. I never would have made so many friends in so many different countries if it weren't for Instagram and now I'm happily blogging as well. So, I gathered a few things to put into a cute little package & send off to one of you!
If you would like to enter this 2.5K/Christmas Giveaway, all you need to do is leave a comment down below telling me what's on top of your Christmas list this year. If you have Instagram & have commented on my last post, leave a comment down below telling me you did so that you get an extra entry into the draw :D (does that make sense?)
And also, a My Week post. I know, it's been a while, but here it finally is. I hope you all had a great week as well & talk to you soon!
Love Always,
Anna Banana ♡
Sunday, October 19, 2014
♡ MY WEEK: 13-19 October 2014
Happy Sunday everybody! Here is what my week looked like. Unfortunately Kalen's aunt had to have surgery but she's making a great recovery so far. Everything went well and hopefully she'll be up & good to go in no time. I've been keeping him and his family company & may have gotten a head start on some super-secret-except-not-very-secret-because-you-can-see-it-in-the-first-picture-if-you-really-tried stuff *wink* Hopefully it goes all according to plan because I've been working very hard on it :-)
As you might be able to tell in the aforementioned picture, I have a lot of sticky notes on my ruler. I used to do this before but kinda stopped for a while. But now it's back in all its colourful glory! Whenever there's something important for me to do, I put it there & the feeling of peeling/ripping it off when I do it is just so satisfying.
Oh, and that "Spending ban"? Not going so well. I cracked. Remember how I said I bought some of the Revlon Colorstay Gel Envy nail polish? Well, 2 became 4... + a post-it cube. I just couldn't resist. First I got the purple shade, Up The Ante. It's such a gorgeous colour & I don't have anything like it so that was justified, as well as the special Top Coat for it. Oh, and about that Top Coat, the brush is super cool! It has sort of like 2 mini brushes in 1. I'm not entirely sure what that's good for or how that helps but hey, it applies smoothly & makes my nail polish look all shiny so that's really all that matters, right?
And when I went to Big W yesterday (big mistake, very big mistake) I ended up getting 2 more. The lighter pink shade is called Cardshark & the darker pink is called Lady Luck. I'm not sure I like them too much so I am very much regretting it... :-( On the bright side, I love my new Post-It Cube! How cute is it? :D I just put it on my desk & it adds so much colour & cuteness.
And here was my #fflovephotoaday picture from last week. I've been very naughty about it & haven't posted many pictures but something is better than nothing...isn't it? ^^"
Anyways, that's it for today!
I hope you're having a great weekend & I'll see you all very soon :D
Love Always,
Anna Banana ♡
Labels:
#fflovephotoaday,
Beauty,
Beauty Haul,
EOS Lipbalm,
Filofax,
Hyundai,
Instagram,
Kate Spade,
Metropol,
My Week,
Nail Polish,
Penguin Books,
Revlon,
Spending Ban,
Stationery,
The Body Shop,
Tote Bag
Wednesday, October 15, 2014
♡ PLANNER ADDICTS TAG
I was so excited to be tagged by @my_planner to do her tag - The Planner Addicts Tag. You can check out her video on YouTube as well for the full tag. I didn't answer a few questions so here is a longer, more elaborate version of my answers.
1. What planner are you currently using?
I am currently using the Personal Size Warm Orange Metropol Filofax
2. What planner(s) have given you planner peace?
Emily Ley's Simplified Planner has (finally!) given me planner peace. Hopefully I won't be investing in any more because I sure don't need it :P
3. Filofax, Midori or Erin Condren?
Filofax. Although I considered trying the Erin Condren
4. Pocket, Personal, A5, or binder?
Personal. I've only ever tried Personal but would like to try out the A5
5. Where do you get inspired the most? YouTube, Instagram or Pinterest?
Instagram & Pinterest - I'm constantly scrolling through endless pictures
6. What's your go to pen?
The Marvy Uchida Le Pens & the Pilot Hi-Tec-C Coleto Pen
7. What are your favorite inserts?
As you all know, I make my own inserts so I guess I'm obligated to say my own :D But I do love the Kate Spade & the Filofax Cotton Cream inserts
8. Stickers, post-it's, or page flags?
Post-it’s all the way!
9. Keep it simple or deck it out?
Keep it simple
10. How many sections do you have in your planner?
6 - Personal, Notes, To Do, Addresses, Monthly, Weekly
11. Do you use a planner for school?
Yes. Honestly, I would not survive without it
12. Rings, spiral bound, discbound or other? Why?
Spiral Bound - I love the way they look & feel!
13. Do you use a dashboard? How?
Sometimes by sticking post-it notes with grocery or to do lists on them
And now, I tag YOU! Feel free to join in, send me your answers or link me to your blog!
Love Always,
Anna Banana ♡
Monday, October 6, 2014
EMILY LEY: Simplified Planner Review
Will you look at that beauty?! In case you missed the #fflovephotoaday post on my Instagram today, my bestie got me this amazing, amazing planner that I have been lusting after for months! Honestly, we are not helping each other's planner addictions (I got her some Kate Spade stationery & a Royal Blue Calipso - it's soooo pretty! I'm so jelly). It's our birthday soon (Halloween :D) so we thought we'd spoil ourselves/each other. We tried to wait until then but we were just so excited when we both got them in the mail.
Our boyfriends don't understand us and even make fun of us at times, but at least we have each other. And our gorgeous planners. Honestly, there will be no planner shortage going on for years now. Oh well. I'm more than satisfied with this Simplified Planner at the moment & as I haven't gotten 2015 inserts for my Filofax yet, I may become a one planner gal come 2015. I know, shock horror. But I thought I'd formally 'introduce' my new baby & give a brief review of my first impressions and whatnot. Beware...it's a long post. A really, really long post. Don't say I didn't warn you.
This is the 2015 Simplified Planner by Emily Ley (amazing, amazing woman btw) in the original Happy Stripe design. It is quite big. Like, really big. It's even bigger than the large Lilly Pulitzer Agenda and here is a comparison with my Personal Sized Orange Metropol Filofax.
But I actually love that it's big & it feels so nice to hold. The gold strap keeps it all together & seriously, it's just so pretty to look at. To be completely honest, I've been more a fan of spiral-bound planners than the ring-bound. I love the way they fold over & just the feel of them... Am I making any sense? And just look at those gold corners. Looooove.
I will mention this though - I'm not sure if it's because the package got a little damaged on its way here, but the spiral bound was a little out of place, making it hard for me to turn the cover & pages easily (without tearing it). I did try to push the spiral binding back into place and it has gotten a bit better but I don't think it's just mine. I've read a few reviews about it being a little stiff and whatnot. But seriously, cute design trumps a minor issue like that for me.
The cover is hard but I found the dark bits like the navy box in the middle are prone to getting scratch marks. It's not actually the deep nail marks & imprints but the light scuff marks. You can kinda see it in the first image at the very top. So I guess it's a good thing we decided on this one instead of the Navy dotted one.
We were constantly on the website, trying to decide which of the 3 gorgeous designs to get. The pink key design was cute as well but I finally decided on this one & I have no regrets. But seriously, Emily should come up with a way for us to have the best of all 3 worlds (p.s. we still keep stalking the website & drooling over the images but now, of course, I'm completely FOR the Happy Stripes :D).
There was a brief moment when Mon was also persuaded into getting this planner but she said she wanted the Calipso to use as a wallet instead. Since the shipping for this was quite pricey, on top of the planner, which was pretty pricey itself ($58 USD), I thought I'd add in a bunch of Kate Spade goodies as well because I was just so grateful! And I'm glad she loves all of it ♡
And can I just give a huge shoutout to Emily here? I mean, right down to the details, everything is just so adorable and so her. Look at the design of the order slip & the little card with the picture of her and her family. There's probably one in a million chance that she's actually reading this, but if she is, congratulations on your amazing success & twins! Not to mention the adorable Brady.

Another great thing about this planner is the pocket on the inside. It's made of cardboard that seems sturdy enough to last me through the year, holding my little bits & bobs. There's also this simple yet elegant & adorable cover page for your name and any other information you want to put. There are also a few pages inside about Emily's story & how the planner came to be, as well as tips & advice on how to use the planner efficiently.

And would you just look at those tabs?! They're a little thinner than I expected. If you own or have seen the Lilly Pulitzer Agendas, the tabs on this one don't seem as 'sturdy' as those - although since they're both basically made of paper, they're not too strong to begin with. But they are covered in plastic so they'll most likely get me through the year. I'm not really one to abuse my planners so it's really no big deal. And now that I've brought up the Lilly Pulitzer Agendas, I thought I'd just say that I prefer this 1 year planner to the 17 month agenda that they have. I found that I was constantly on a mission to find what day we were on because there were just so many pages before it.
And of course, there is the basic year at a glance calendar, which again is simple yet nice to look at. I love that she offers so many free printables on her site & I've printed a lot off for myself such as the Blog planning & Recipe ones. I'm sure she'll eventually upload the 2015 ones as well so subscribe to her blog to stay updated (I certainly did :D) She also included a Bucket List & 2015 Holidays page in this planner which will come in handy - although there are a few American holidays... I actually love knowing them so I don't at all :-)
And the planner begins! The good thing about the Lilly Pulitzer agenda was that they had a page full of stickers & I would have loved for this one to have the flag stickers in them but you can purchase them separately from the site. Again, no biggie because I have more than enough stickers & washi tape to use and decorate my planner.
So here is what the typical week day would look like. I probably should have mentioned that this is the daily planner. The weekly one is also available and is understandably thinner than this. However, that one is only available in the navy polka dot one. Anyways, as you can see, each day has an inspirational quote at the top, the day split into hours from 7am-7pm, a to do list, a little notes section & a section for dinner as well. I'm not entirely show how useful the dinner section will be for me since I don't cook for kids or my family and basically just eat whatever's in my fridge (lately it's been granola & yogurt with a side of Pringles) so I might use it as an extra notes section. I'm thinking of maybe using it as a Blog section to brainstorm topic ideas, note things to photograph, posts published & scheduled, etc.
One thing I noticed was getting quite a bit of negative feedback (because I just spend my nights scrolling through the site over & over again... Yes I'm a sad individual) was that the weekend shares a page. That means Saturday & Sunday is not divided into hours but just am, lunch & pm. I actually don't mind it too much at the moment, but I'll keep you updated on that once I actually start using my planner. I think once I start uni again, this may also become a teeny bit of a problem for me, but we'll see.
The Sunday section is actually a little different in that there is a checklist in the 'Weekly Prep' section, which replaced the 'Notes' section. You may not be able to see it properly in the image but there are: Plan meals for the week, Tidy up for a clean slate on Monday, Write tasks + appointments for the week & Fill you 'tank'. Enjoy what matters most. I actually don't mind this as I would probably find these quite useful but that's something thing to keep in mind if you're thinking of getting this planner.
Another thing I absolutely love, love, love about this planner is that the monthly calendar comes before the daily every month. The Lilly Pulitzer agenda had that too but it also had an additional section of just months, which I thought was handy at first, but became a little too much to handle. Also, although you can customise & print your Filofax inserts to be like this as well, it doesn't work as 'smoothly' since Filofax usually makes & sells the weekly/daily & monthly inserts separately.
I also love that it has the previous and next month printed at the top just for reference & that the holidays are all written in the cute flag style on the actual dates. And I know this is just a tiny thing, but I love the little coloured pineapple that matches the tab colours. That one little coloured detail just completely changes the entire page while keeping it on the down low. As you may remember my new favourite word, it's a 'muted' cute & elegant combination. And of course, there's a little quote at the top as well.
Again with the small details, but the font used throughout the planner is so nice to look at. It's not the (forgive me, Times New Roman lovers) boring, old Times New Roman style or any other boring font like that, but it's just so...cute! I mean, Times New Roman has its benefits, especially when writing formal letters and such, but this is a planner! Something you'll use every single day for a whole year (probably every year for the rest of my life). Might as well get one that's nice to look at, right?

Finally we've come to the back of the planner. It's just the same Happy Stripes design with the signature Emily Ley label. I read about the story behind the Pineapple & have just come to admire the brand and Emily herself even more. As always, the navy & gold combination is perfect, adding a touch of elegance to a happy, colourful planner. That combined with the gold corners, the slightly 'glittery' gold strap & the spiral bound makes this planner perfection down to a T.
Based on just looking through this planner & not having used it, I'd recommend this planner to the busy, busy bees, especially those chasing after kids on a daily basis. But it will also most definitely be suited to students & business people and anyone in general really. However, it's not as 'portable' as smaller planners or Filofaxes as it is quite large so it might be better used as a 'home based' planner. Also, as I briefly mention earlier, it isn't cheap. $58 for a planner but trust me when I say it's a sturdy one that will get you through the year. I am willing to commit myself to this planner for an entire year without buying any more (although we'll see how long that actually lasts :P) I'll also try to do an updated post on how I like it in the new year to let you know more.
As always, a super, super long post from me but at least it had lots of pictures of my gorgeous new planner, right? I just can't get over how cute it is & can't wait for 2015 to come! I already thanked Monica over & over again, but I just wanted to give her another shoutout. Mon, I know you're reading this because you're my bestie & I make you, but thank you so, so, so much! You're my sister from another mother, basically a twin because we have the same birthday (& year!). I'll love you forever & ever! (sorry Kal...I love you too!)
And for all my loyal readers, thank you for all your love. I know it seems like I say this all the time, but I'm honestly so grateful to you for everything. And I really do want to give back all you've given me (I may or may not be hard at work on a sneaky little giveaway so stay tuned!) Be sure to let me know if you yourself have a Simplified Planner, intend on getting one or any other planner that you think I'm might be interested in... Not that I need another one... But I do love just looking through images of pretty planners... I know you do it too :P
p.s. I'm also doing the #fflovephotoaday challenge (kinda) so don't forget to follow me on Instagram for more planner photos (aka planner porn :P)
Love Always,
Anna Banana ♡
Sunday, October 5, 2014
♡ My Week In Photos: 29 September - 5 October 2014
Happy Sunday everybody! I hope you all had a great week. I most certainly did :-) Watch out for an exciting little post tomorrow :P Here is what my week looked like in my Filofax. As I mentioned a few posts ago, I'm doing Yay, for Fridays! Filofax Photo-a-day Challenge. I'm not strictly following the rules and doing it everyday but only on those I can/want to. You are probably also supposed to include a planner of sorts but we'll see.
Day 1: This Month
p.s. Keyboard Washi Tape Decoration Tutorial coming this Tuesday! It's a little self-explanatory but why not? :D
Day 3: Blue
Martha Stewart binder, Project Life Cards & Marvy Uchida Le Pens
Day 5: Grateful
Kalen knows exactly where I keep my favourite stationery and likes to leave little surprise notes here & there. I'll always be grateful to him :D
If any of you are doing the Filofax Photo-a-day Challenge, please let me know so I can check out all your awesome pictures!
Love Always,
Anna Banana ♡
Wednesday, October 1, 2014
TIP TUESDAY: Erasable Lists
Hello everyone! Welcome to another Tip Tuesday! To be honest, I'm not sure how long I can make this a weekly thing so sometimes it might be every 2 weeks or possibly even a Tip Thursday, but hopefully that's okay with you.
Today we're going to be making erasable lists for Filofaxes. And really, it doesn't only have to be for ring-bound planners. I think it you cut the holes out properly, you'd be able to put them in spiral-bound planners & notebooks as well. So, here is what you will need: a laminator, Filofax To-Do list, spare pieces of paper, hole puncher (single punchers are quite convenient), scissors, permanent marker & nail polish remover.

I often find it annoying when I'm laminating something small & have so much scraps left over. So I thought, how about cutting them up to put in my Filofax? With one A4 laminating pouch, I was able to get a personal-sized Filofax to-do sheet, a square blue piece of paper and make a 'flyleaf' in the personal-size and a smaller size.
I always found myself throwing away heaps of post-it notes with grocery lists on them so I thought laminating a to-do sheet would be convenient. Every week I can rub it off and start a new list. And this not only applies to grocery lists but to-do lists, wish lists, etc.
As you'd expect, you write on them with permanent marker as whiteboard markers often transfer onto the opposite page & can get rubbed off easily. I use nail polish remover to get rid of it later on but you can use whatever works for you of course.
And of course, you can use the leftover laminated pieces to create a transparent flyleaf so that you can write on top of your actual weekly pages & still be able to see through them. Or you can also use them to 'pencil in' dates that aren't completely confirmed & always just erase them afterwards. I love how versatile these transparent sheets so please let me know any other uses for them if you come up with them!
I also cut from the edge to the middle of the holes on the side so that I can snap the laminated pages into place without constantly torturing my Filofax rings (sort of like the Filofax rulers). I love this idea so much! It's so handy to just move into different parts of my Filofax - the front, monthly, weekly, anywhere!
Finally, you can cut your sheets into different shapes. As you can see above, I cut a top tab to use as a weekly page marker, but you can also use them as side tabs, etc.
I hope you found this idea helpful & I'd love to see your pics of them if you decide to try them. I remember a while back, I even made a pocket out of laminated coloured paper. So as always, let me know how it goes!
Love Always,
Anna Banana ♡
Saturday, September 27, 2014
♡ 2015 INSERTS & MY WEEK: 15-21 September 2014
As promised! Here are the 2015 inserts! Finally, finally, finally! But I have been hard at work these past few days & here they are!
I asked you whether or not I should change the design up a little but from the feedback I got, you all seemed to want me to keep them exactly the same. So that kinda made my job a little easier. But for 2016, I'm thinking of making an extra set of inserts that look a little different, as well as the same design. And who knows, if I'm feeling a little creative, I might even make some for 2015 as well.
As you may or may not have noticed, I have reverted back to Blogger. It really is just so much more convenient & I sort of made it look like my other one so it's okay, I guess. I'll still be posting on there, probably just for me & whoever else wants to keep reading that, but this is probably the most convenient for all of us. However, for downloading inserts, I will post them on my Wix site as it is most likely easier for downloading. So click here to be directed to that particular post. And please let me know if they don't happen to work so I can find a way to fix it ASAP.
And here is a slightly belated 'My Week' post for the first time in a while. I've been relaxing, getting my life in order and whatnot so it's been quite nice. I'm always so grateful to have my friends, my family and all of you. Even if no one may be reading this, I love sharing my love for organising, planning, beauty & skincare products, and everything in between. So I just wanted to say thank you to anyone who sticks around, reading my long ass posts & leaving me such wonderful comments.
Love Always,
Anna Banana ♡
Wednesday, September 24, 2014
TIP TUESDAY: How To Print Double-Sided on Filofax Paper
Here is the long awaited 'tutorial' on how to print double-sided on Filofax paper. In case you're wondering about the photo, it's really not relevant to the post. I was just looking through my images & liked it so there is is.
Step 1: Page Setup
If you got to Print, you're able to go to Page Setup and the Manage Custom Sizes to adjust the paper size. Since I print quite often on Filofax paper, I made a custom Filofax page with the dimensions of the Personal size Filofax paper (17.2 x 9.5 cm). You can also make this appear on your list of paper sizes by clicking the little + sign.
Step 2: Adjust Printer Paper Size
Here is what my usual paper tray in my printer looks like. As you can see, the width & height are so that they will fit A4 sheets of paper. What I do is, I place a sheet of Filofax paper in it and use the adjusters so that it will snugly fit personal sized sheets.
Above: A4 - Below: Personal Sized Filofax Paper
Step 3: Printing on the RIGHT/FRONT Side
LEFT RIGHT
I labeled the sides of my Filofax so that you know which side I'm talking about when I say Left & Right side.
Now, you may all know that there are 2 sides of Filofax sheets (duh, Annie). But what I mean by this is that I like to think of the side with the Filofax writing in between the 6 holes the 'Top/Front' side. And so all my pages will have this text showing on the right side of my Filofax (green circle).
Let's take the monthly pages, for example. The Thursday/Friday - Sunday part is on the right. So, let's print that side now. Since I want the Filofax logo in the middle to appear on that page, I put it face up on my paper tray. Then here is where the magic happens. Flip it. That's right, you heard me. Flip it.
I oriented the picture so it looks how it would look if you were to be pushing the paper tray into the printer (blue arrow). You may be able to feintly see the Filofax logo (green circle). That is the key. If you want something printed on that page, it must be facing down. So, in goes the paper and remember to click print on only the second half of the month (Thu/Fri-Sun).
This is what your newly printed page should look like. As you can see, the Filofax logo is up front & centre :D (green circle). This is a minor detail which you can of course choose not to do, but I find that it makes everything in your Filofax line up nicely.
Step 4: Printing on the LEFT/BACK Side
Now we're going to print the first half of the next month on the back of this page that we just printed. Since the other side of this paper is blank, that is where we want to print it (haha, obviously). So, if I taught you anything today, it's that it must be facing down. So this is how we're going to push the paper tray in.
And if all worked out, you should have successfully printed double-sided! Here are 2 pictures of exactly the same sheet of paper, just side by side.
I reeeeeally hope that this was as helpful as I wanted it to be. I understand that this is definitely a learning process. I still mess up quite a bit but hey, it's all good fun...isn't it? And once you start print out a whole year's worth of inserts, it'll come to you naturally.
Unfortunately I can't help those who want to print on A4 sheets & cut them to size. I've only ever printed my inserts on blank FIlofax paper & I can definitely say it's very convenient.
I hope this helped & I'd love to hear if it worked out for you!
Love Always,
Anna Banana ♡
Subscribe to:
Posts (Atom)